

How to Modify MS-List Toolbar Buttons
Modify Microsoft List Toolbar Buttons with List Formatting (JSON)
Microsoft 365 Expert, Web3 Enthusiast, Jack-of-all-trades and exceptionally gifted Peter Pan. Passionate about digitalisation, collaboration, "boards" (from surf over chess up to monopoly) and Pizza.
Have you ever wished you could modify the standard toolbar buttons (New, Edit, Share, etc.) in your SharePoint or Microsoft Lists? Thanks to SharePoint List Formatting capabilities now we can! This is accomplished by the use of JSON (JavaScript Object Notation) to change the text of buttons, hide them completely or move them to the so called overflow area.
A brief overview
The command bar is located at the top-left. Right there we have our "new", "edit" and "grid", "share" and all of these different buttons. In addition to all these buttons that we have in the command bar you'll see on the right side of the command bar three dots that we can click and this gives us some additional hidden commands from your view that we can use.
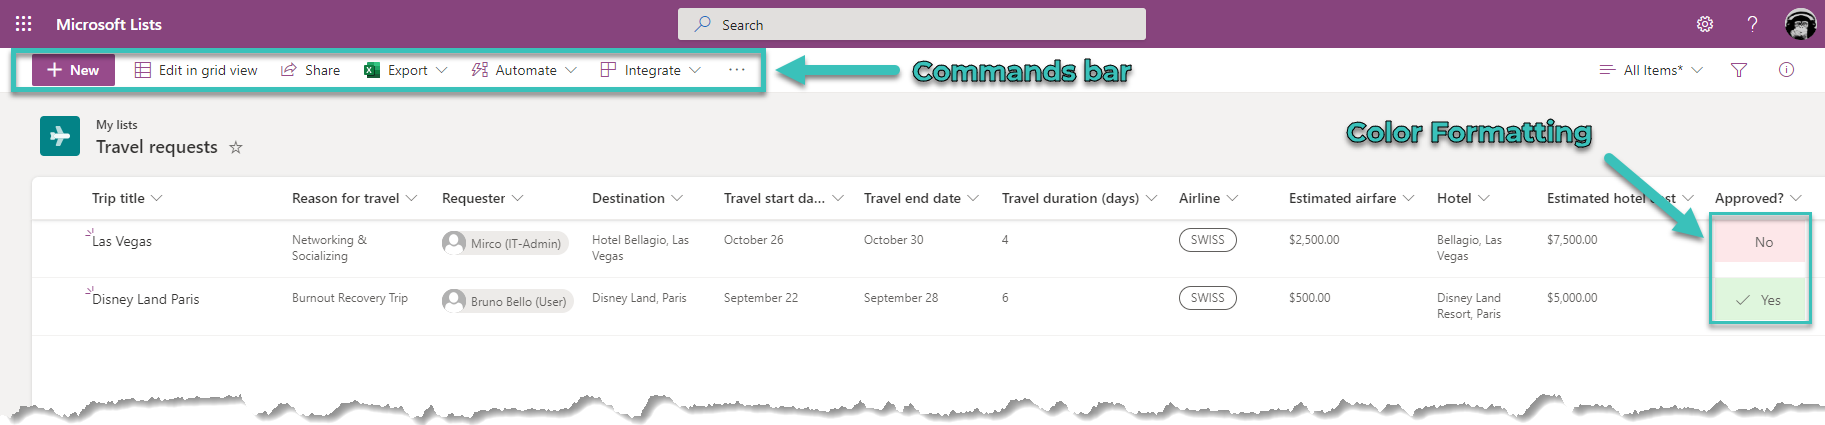
So there are a few things that we can do with List Formatting in SharePoint. Let me summarize it really quick; The SharePoint List I use in this article is actually one created using a microsoft list template. You'll notice that we have some color coding going on here (Approved?) So on this column for example we have some color coding based of the Travel Request is approved or not. This is all done using sharepoint list formatting. SharePoint List Formatting gives us a way to override the look and feel of a particular column or an entire view or even list-forms... and now we can even override the look of the command bar :-).
About List Formattings
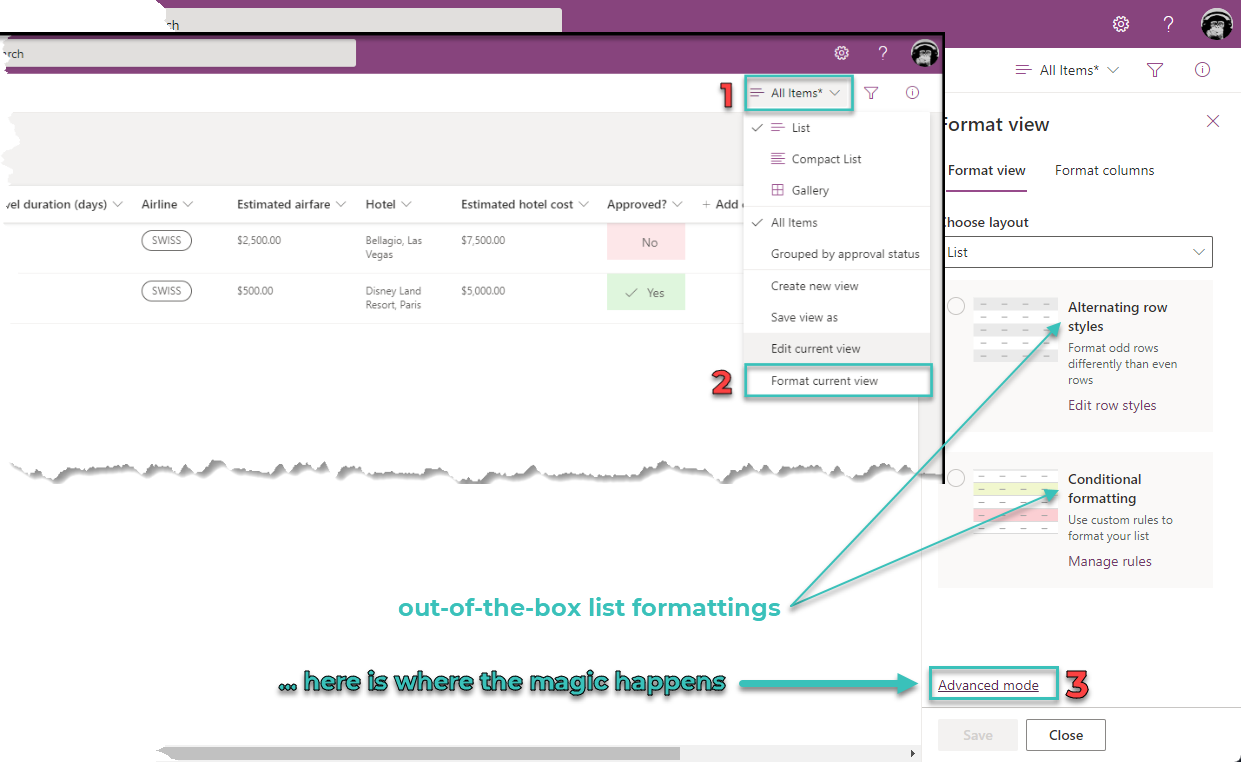
Formatting in Lists can be appleid either on a single column or on the entire list. Microsoft also offers some out-of-the-box formattings for columns and lists but they often don't suffice. But luckily there is also the possibility to edit List Formattings with JSON by using the "advance mode".
To get to "advanced mode" in List Formattings, do the following:
- click on "All items" in the top-right
- click on "Format current view"
- click on "Advanced mode"
How to modify MS-List toolbar
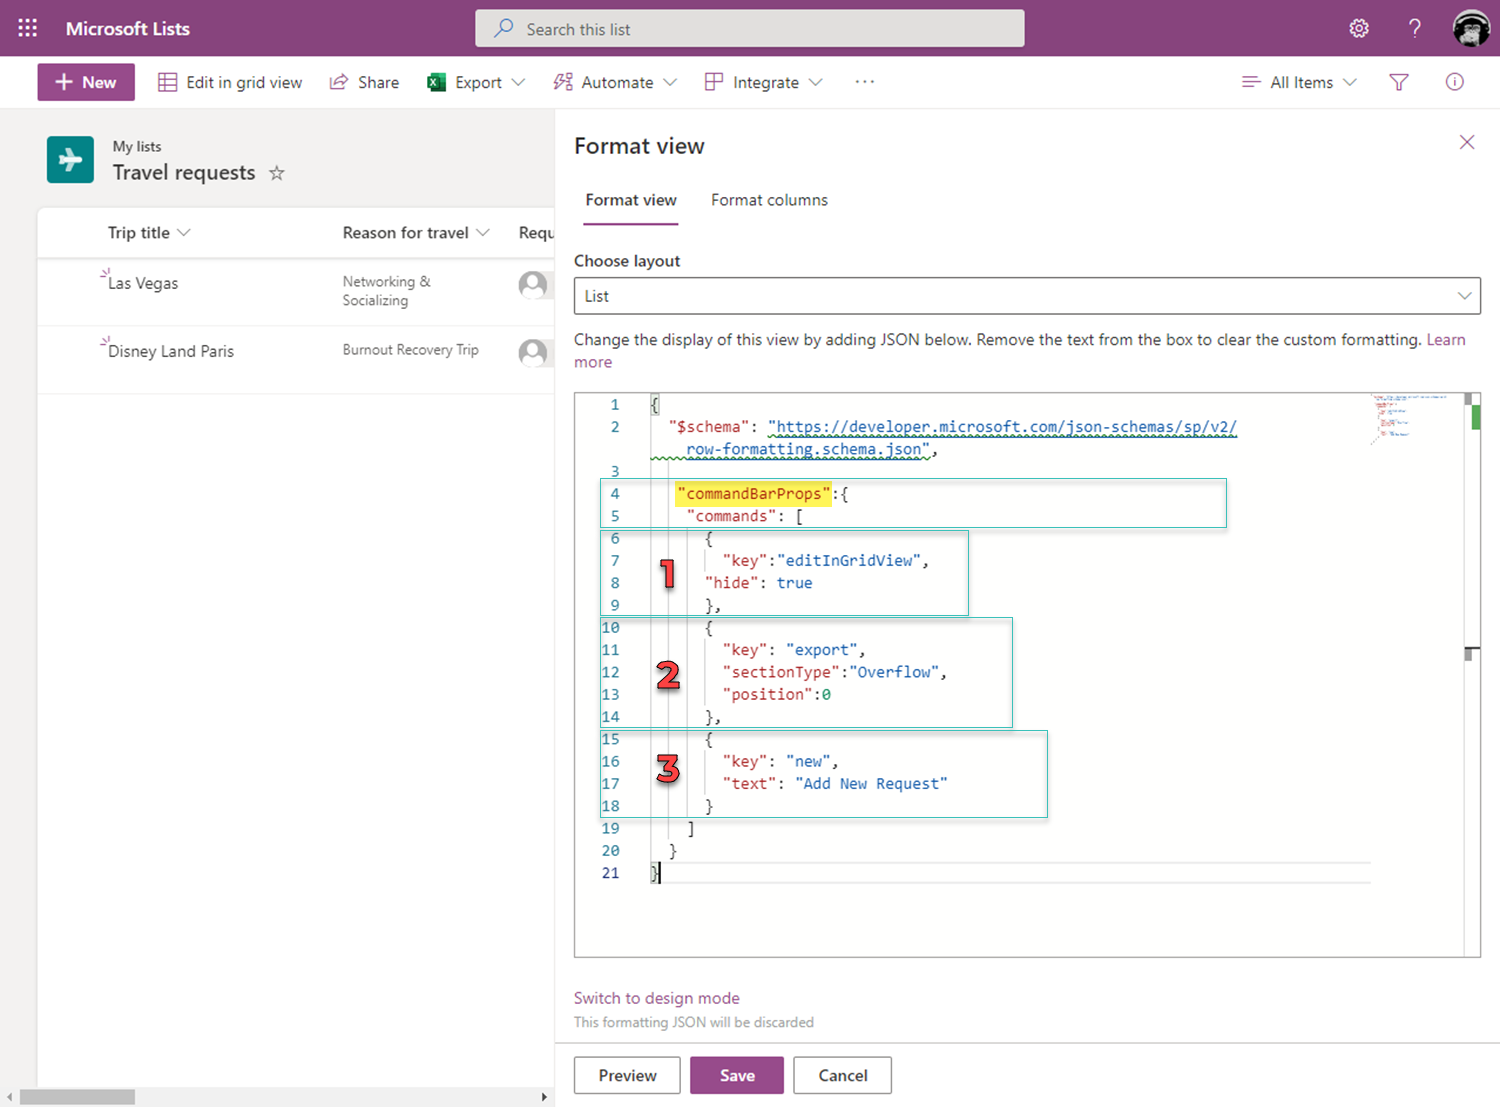
To modify the MS-List toolbar, we can use the property CommandBarProps.

The modifications I am going to explain here are the following:
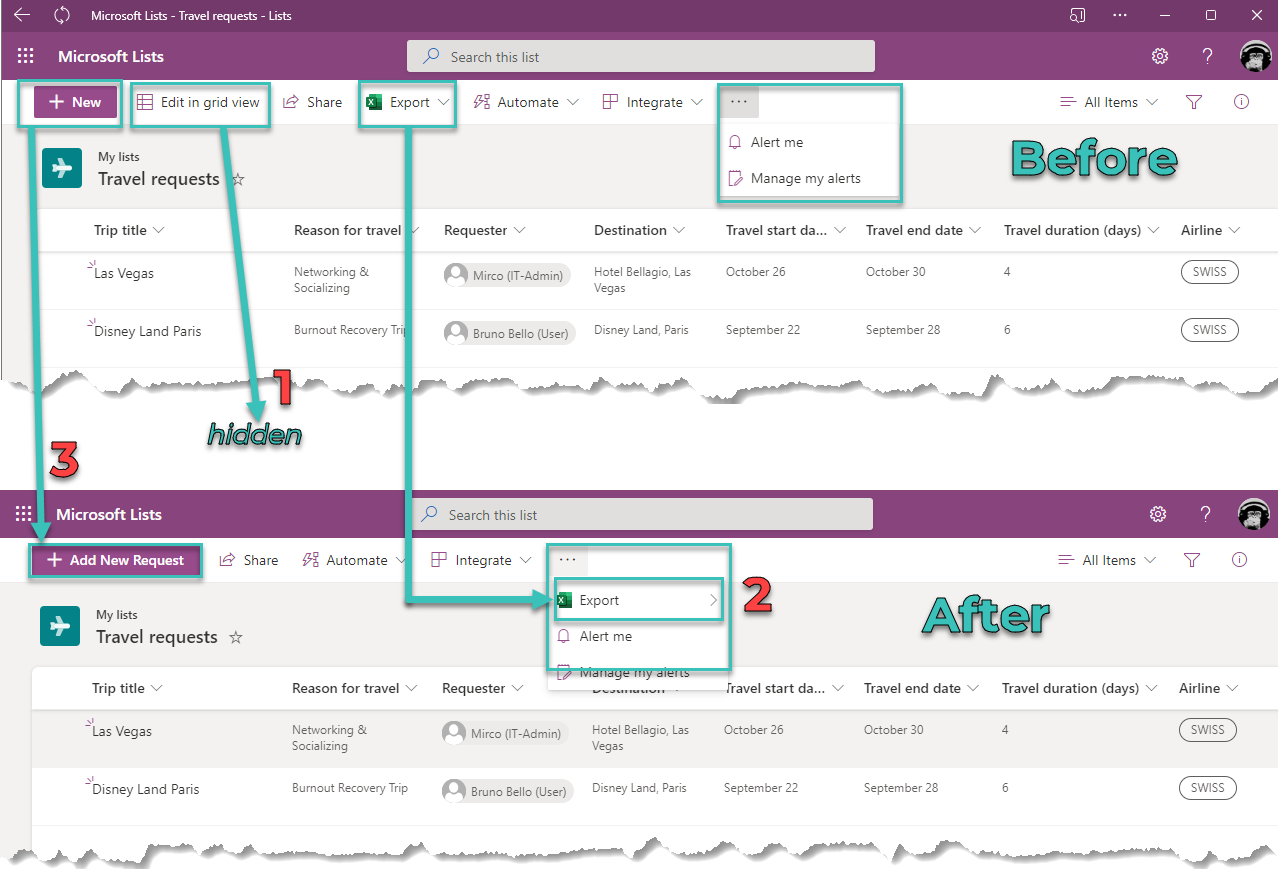
- Hide the "Edit in Grid View" Button
- Move the "Export" Button to the Overflow-Area
- Modify the text on the Button "New"
Hide the "edit in grid view" Button
To hide the "Edit in Grid View" Button, we need to add the right key to the CommandBarPropsProperty and set the hide-flag to true.
This would look like this:
"commandBarProps":{
    "commands": [
      {
        "key":"editInGridView",
      "hide": true
      }
    ]
  }
Thanks to intellisense you can easily find the right spelling and get an understanding about other keys and options.
Move the "Export"-Button to the Overflow-Area
To move the "Export"-Button to the so called Overflow-Area we can use the key export as follows:
   "commandBarProps":{
    "commands": [
      {
        "key": "export",
        "sectionType":"Overflow",
        "position":0
      }
    ]
  }
NOTE: The Overflow-Area is that part of the menu which will appear after clicking on the three horizontal dots on the right of the toolbar.
For the option "position", I choosed the value 0 which will bring the "Export"-Button to at the top of the Overflow-Area (1st position). Than higher the number, then lower the position
Modify the text on the button "New"
The button "New" at the top-left is used to add entries to the MS-List. If you have a list to e.g. register Travel-Requests or place orders, it might be pretty neat to have something more specific that "New" as a label for that button. In my example, I use an MS-List to keep track of Travel Requests. Therefore I want to change the text for the Button "New" to "Add new Request. This can be accomplished as follows:
   "commandBarProps":{
    "commands": [
      {
        "key": "new",
        "text":"Add new Request",
      }
    ]
  }
Conclusion
I like MS-Lists very much and with the List Formatting capabilities (now also for the toolbar) I see it as a helpful tool to enable organisations to realise simple automation and approval use-cases without having to create a PowerApp (and without having to face the licensing costs for a PowerApp).
I am currently working on a customer request for a solution, which should automate the order-process for VM-Machines within their organisation. The initial solution was originally...
- Develop a PowerApp
- Do the automation and approval steps with LogicApps
- Use BICEP scripts to deploy the ordered VMs
After some discussions, we realized that we could save the PowerApp licensing costs and use MS-Lists with a SharePoint Site instead to create a cost-efficient and reliable solution. The main reason for having PowerApps in the solution was to create a proper UI for the users which will finally order VMs over that solution. So in the end it was MS-Lists, LogicApps and BICEP. And thanks to List Formattings we could provide a custom tailored solution by using MS-List to handle the Order-Process and the approvals.
This is once more an example for the simplicity and the power of MS-Lists. :-)